Queen Bee Eats for a Day

Cherry Cherry July 28, 2010

Filed under: Cooking Adventures,Recipes & How-Tos — queenbeeeatsforaday @ 10:40 pm
Tags: ,

Apparently I was thinking of the 1966 Neil Diamond song when I was came up with a title for this post.  My intentions were to avoid something like “How to Freeze Cherries” which can be so bland and boring, right?

So, the weekend of July 4th this year brought several new adventures for me – I learned to make simple syrup and I learned how to freeze fresh cherries.  Freezing cherries was completely an accidental discovery.  Here’s the backstory.

The summer is a great time for fresh fruits and vegetables; we all know that!  The cherries we had been getting were particularly good and as such we bought a few more packages.  My mistake was that I assumed each was going to be as sweet as the last.  Well, that last package just wasn’t sweet enough to eat, but definitely good to cook with.  What to do?  A little quick research told me I could freeze them for later use – fabulous idea!  I could then figure out what to do with them later.

So, I thought I’d share what I learned – it’s not everyday you learn to freeze cherries, right?

You will definitely need a cherry pitter – one of the greatest inventions of all time!  You can pit most olives, cherries, and just about anything else that fits inside!  Caution: Keep your fingers OUT of the way – we learned the hard way.

How to Freeze Cherries:

1 – Wash the cherries carefully, removing any debris.  Remove the stems while you wash them.  Rubbing them gently with your fingers will usually suffice.

2 – Remove the pits.  You can freeze cherries with the pits, but they often take on a nutty, almond-like flavor, so you may want to avoid that.

3 – Lay the washed, pitted cherries in a single layer on a baking sheet and place in the freezer until frozen.  This will prevent them from clumping together and will retain their shape.  They will remain round and colorful.  After they are frozen, place them in a freezer bag, removing all the air.  They will last about a year.

Tips & Tricks for Storing and Freezing Cherries:

  • Allow the cherries to dry thoroughly before you freeze them.  This will reduce the likelihood of them all sticking together when you freeze them.
  • When shopping for cherries you should look for cherries that are bright, shiny, and plump.  The darker the cherry, the sweeter the taste.
  • Cherries with their stems have a longer shelf life.
  • When pitting cherries you may want to don an apron – the juice stains everything!
  • If you aren’t freezing your cherries, store them unwashed in plastic bags in the fridge.  Before eating, let them come to room temperature for the best flavor.
  • Some cooks like to freeze cherries in a syrup (40% – 4 parts water to 3 cups sugar) and ascorbic acid or citrus juice.  I skipped this because I am not sure what I will use the cherries for.
  • Sour cherries are best for freezing for pie filling.  You stir in sugar (measurements depend on how many cherries, etc.) and pack in rigid airtight containers for this purpose.

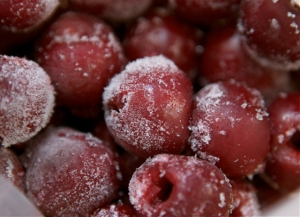
Our cherries are sweetly nestled in the freezer, waiting for me to decide what to do with them.

Does anyone have any ideas?  Make a compote?  A pie, perhaps?  Some cherry sauce for sundaes?  Would love some suggestions!


Simple Summer Stir-Fry July 17, 2010

Filed under: Cooking Adventures,Recipes & How-Tos — queenbeeeatsforaday @ 9:22 am
Tags: ,

The summer is a great time to eat fresh fruits and vegetables.  Not only does the grocery store have more of a selection fresh produce that actually looks appetizing (at least in New York) but the farmers markets are out of this world.

Because this is such a great time for produce, it’s also a great time for making a really good stir-fry, which I am all about.  It’s healthy, it’s quick, and it’s something Husband will eat!  In fact, I’ve heard that a stir-fry is a great way to get the kids to eat their vegetables as well!

So, a couple of weeks ago I found a recipe for a simple stir-fry and jazzed it up a bit.  And  even if you’ve never made a stir-fry in your life, this is so easy to do (and easy on the wallet as well.)

The Ingredients:

  • Fresh ginger, minced – 1 tablespoon
  • Fresh lemon juice – 1 teaspoon
  • Vegetable oil (though you could use Peanut) – 3 tablespoons
  • Asian sesame oil – 1 teaspoon
  • Salt – ½ teaspoon
  • Fresh ground pepper – ¼ teaspoon
  • 3 Cloves of garlic, minced
  • 2-3 heads of baby bok choy, stalks cut into ½-inch pieces and leaves shredded, separate
  • ½ pound of snow peas
  • 5-10 radishes, depending on size
  • 1 medium zucchini
  • 1 medium yellow squash
  • ½ pound of spinach (without the stems and washed well – baby spinach is great, too)
  • ½ pound of tofu (firm), chicken, shrimp, or beef (depending on your preference)
  • Soy sauce – 4 teaspoons

The Process:

  1. Combine the ginger, fresh lemon juice, 1 tablespoon of the cooking oil, sesame oil, ¼ a teaspoon of salt, and the pepper.  Whisk well and set aside to allow the flavors to mingle.
  2. In a wok, heat the rest of the cooking oil over medium-high heat.  When the oil is hot, add the garlic and stir until it’s fragrant, about 10-15 seconds.  Don’t let it burn!
  3. Next, add the bok choy stalks and cook for about 1-2 minutes, just until it starts to soften.  Throw in the snow peas and cook for another minute or two.
  4. Add the radishes, zucchini, squash, and soy sauce cooking and stirring for another minute.
  5. Now, add the bok choy leaves and spinach plus the remainder of the salt.  Cook and toss until the leaves begin to wilt; this should take about 2 minutes.  Add a tablespoon of the stir-fry sauce you made earlier – just enough to coat the contents of the wok.  Then, remove the vegetables from the wok.
  6. Add the rest of the stir-fry sauce to the hot wok and heat it over medium-high heat.  Add the tofu, chicken, shrimp, or beef.  If you’re using tofu, cook until it’s just warmed through, for about two minutes.  With chicken and shrimp, make sure the meat is cooked through.  Cook the beef to your preferred temperature.
  7. Put the vegetables back into the wok and toss everything together.

We served this dish over plain white rice, at Husband’s request.  But for a fun twist we thought you could try some Asian noodles.  I love picking at stir-fry as-is, so I often leave out the rice.


Independently Simple July 7, 2010

Filed under: Cooking Adventures,Drinks,Recipes & How-Tos — queenbeeeatsforaday @ 5:00 am
Tags: ,

Over the years I’ve seen plenty of recipes for homemade beverages and yummy cocktails that have called for simple syrup that’s I’ve simply avoided because I was afraid. Afraid of the simplicity of it, I suppose. Until now…until the 4th of July!

Independence Day 2010 included not only fireworks and simple syrup but plans with some Brooklyn-based friends who love good food, good times, and good drinks. They were doing the fantastic menu (corn salad, potatoes, tomato & mozzarella, coffee rubbed steak, and brownies for dessert) so we offered to bring the cocktails. Then I got to thinking, what’s the best outdoor, summery drink for the 4th of July?

Mojitos. Of course!

It was the perfect solution. They’re cool, refreshing, fruity, and sweet. They go down easy. And some recipes require simple syrup so I bit the bullet, pulled out my saucepans, sugar, and water.

I’m going to tell you a secret. They don’t call it “simple syrup” for nothing.

Here’s what you need – 1 part sugar, 1 part water, a stove, and a pot. That’s it!

Here’s what you do – Put the water and sugar into the saucepan and bring it to a boil. You can stir it once or twice, but just keep an eye on it until the sugar is completely dissolved.  Then, remove it from the heat, let it cool, and refrigerate for later use.

Here’s a hint or two – You know you’re on the right track as the liquid in the saucepan thickens and drips off your spoon or whisk in a stream. If it acts like syrup you’ve done good! For sweeter syrup, you can do 1 part water, 2 parts sugar. Oh, and simple syrup usually stays good for about a month in the fridge.

You can flavor the syrup with a couple of pieces of peeled ginger, lemon zest, or just about anything else to give it an extra kick.

That’s it. Super simple. Simple syrup.

Keep your eyes out for the upcoming post, Mojito Madness, to get your drink on.


Let them eat (gluten-free) cake March 23, 2009

Filed under: Cakes,Cooking Adventures,Recipes & How-Tos — haleyhoneybee @ 5:43 pm
Tags:

As a wedding present for a childhood friend of my hubby, we are making them some cakes to serve at their wedding. We could call them wedding cakes. And this has become a cake baking adventure for many weeks.

Strategy:img_6676

  • The betrothed have very adventurous taste buds and are non-traditional in a fabulous way.
  • Instead of just one cake, we decided to make cakes of various sizes, each with a unique cake stand/plate (most of which are vintage).
  • The Bride has gluten intolerance so care must be taken. For the wedding day only one of the cakes will be GF but for the cake tasting I baked them all GF so she could partake. (This would be a good time to mention that my Mama is allergic to all things wheat, and buckwheat, and totally Celiac…so I have a bit of practice)

The cakes that made the cut for the tasting (recipe links in progress):

  • Black pearl layer cake with ginger vanilla fresh cream frosting
  • Cranberry snow cake with white chocolate Swiss butter cream frosting
  • Lemon Curd layer cake with lemon Swiss butter cream frosting
  • Passion fruit layer cake with passion fruit Swiss butter cream frosting
  • Honey spice cake with cardamom cream frosting
  • Honey spice cake with a thick sugar glaze (made the cake twice because I wanted to try it with garbanzo flour)
  • Molten chocolate mini-cupcakes

img_6666

*Note on the alternative flours used: The first five cakes were all made with a white rice flour blend, for one of the honey cakes I used a garbanzo flour blend, and the cupcakes only call for cornstarch.

There was also a red velvet cake with a cream cheese frosting, but that one was nixed during a previous trial – after much research on classic recipes, in the end it didn’t have enough oomph.


Fettucine Alfredo – Quick and Easy

Filed under: Recipes & How-Tos — queenbeeeatsforaday @ 1:22 am
Tags:

fettucine-alfredo

It’s funny that the things you didn’t love growing up kinda grow on you as an adult.  A few years ago, I had such a craving for fettucine alfredo and decided to learn how to make it.  Looking back at my years at home, my mom would make this dish and I would dread it.  Today, while it’s still not my favorite Italian dish, it ranks quite high.

It’s super simple to make and chances are, you already have everything you need in the pantry and fridge.  It is the perfect dish to make when you don’t feel like cooking but you also don’t feel like any take out.  Give it a shot!  You’ll be ready to eat in less than a half hour.

adding-cheese

The Ingredients:

  • 1 pound dried fettuccine
  • 6 tablespoons unsalted butter
  • 1 shallot, minced
  • 1 cup heavy cream
  • 1 cup finely grated Parmigiano-Reggiano
  • 1/2 teaspoon salt
  • 1/4 teaspoon freshly ground black pepper
  • A pinch of nutmeg, optional
  • Fresh parsley, for garnish, optional

before-tossThe Directions:

1. Bring a large pot of salted water to a rapid boil. Cook the fettuccine until al dente. When the pasta is done cooking, drain it and reserve 1/4 cup of the pasta cooking liquid.

2. As the pasta cooks, melt the butter in a medium saucepan over medium-high heat. When the butter is melted, add the shallots and sauté until tender.

3. Add the heavy cream and bring the mixture to a boil. Add the nutmeg here if you choose to.

4. Cook the cream mixture, stirring occasionally, until sauce has reduced slightly, about 5 minutes. Remove from the heat.

5. Put the pasta, along with the reserved cooking liquid, back into the pot it was cooked in. Heat this over medium-high heat.

6. Add the butter-cream mixture to the pasta and half of the grated Parmesan-Reggiano. Toss to coat. Season with salt and pepper.

7. Sprinkle with remaining Parmesan-Reggiano and garnish with parsley.

Serve immediately. This recipe yields about 4 to 6 servings.

XOXO
QB


The Perfect St. Patrick’s Day Meal March 17, 2009

Happy St. Patrick’s Day, everyone!  Hope you’re wearing lots of GREEN!

the-table


Two weeks ago, my sweetie and I were in Gainesville partly for business and partly for pleasure.  I had scheduled a work trip to coincide with the same week of the Morrissey concert in Jacksonville for which we had tickets.  (The show was cancelled.)

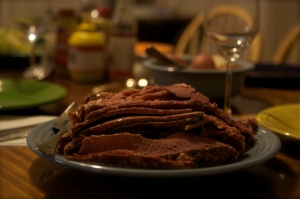
corned-beef


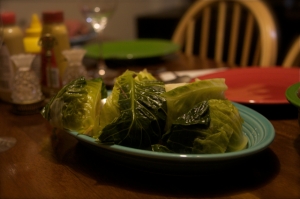
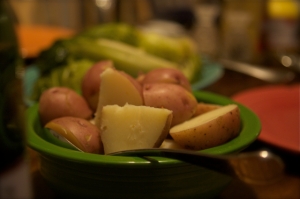
As serendipity would have it, the other bee, Melissa, was also in town for work and my sister, Jennifer, was free, so what better way to celebrate our meshing schedules than to invite ourselves over to Donald and Erica’s for an early St. Patrick’s Day meal – Corned Beef, Cabbage, and Potatoes.

cabbage


We paired dinner with some Trader Joe’s Shiraz (surprisingly good) and a couple of beers.


potatoes


Melissa provided a quick, simple, and lovely conclusion to the meal in a dessert of fresh strawberries and cannoli accompanied by some really terrific Sweetwater (locally roasted & organic) decaf coffee Donald brewed.


dessert

It was a fun night filled with lots of food and friends.  I think we all had a really great time and can’t wait to do it again!

Here’s the Recipe –

New England Boiled Dinner

Ingredients –

4-5 pound corned beef brisket
1 head green cabbage, cut into wedges

8 red skin potatoes, halved
2-3 tbsp dried pickling spices

Directions –

  1. Place the corned beef in a large pot and fill with cold water.  Add the pickling spices to the pot – sometimes the corned beef will come with a packet of spices but it’s usually not very much.  Let the beef simmer for 3 hours.
  2. Next, add the potatoes to the same pot and let simmer for 10 minutes.
  3. Add the cabbage and let simmer until the cabbage and the potatoes are fork tender.
  4. Finally remove the vegetables and the corned beef from the pot.  Thinly slice the corned beef perpendicular to the grain of the meat. Serve with a variety of mustards or horseradish sauces.

Everything was really delicious and cooked to perfection!  After seeing how it was done, it seems like a super easy way to make a lot of food for a hungry crowd!  Thanks again, Erica and Donald!

XOXO
QB


Tuesday must be the new burger night! March 11, 2009

Filed under: Recipes & How-Tos — haleyhoneybee @ 11:52 pm
Tags: , ,
Tuesday night had something in the air…maybe the smell of burgers. And when I checked my email on Wednesday morning there was a note from Rica about their mouth watering BIG burgers. My hubby and I had also made burgers Tuesday night – although ours were considerably different, and meatless. I thought the irony of the burgers deserved attention.
Try them out and see which is your preference.
xoxo,
HHB

Burger #1, Black Bean with pineapple salad. I must admit, sometimes I’m just not in the mood for eat. And I am always up for a veggie-only night, but these burgers were a far cry from a girly California veggie burger – yes we are in Cali but they can fill up a manly appetite – take my hubby’s word for it. My uber-fav part was the pineapple salad to accompany – YUM, the perfect side.

img_6637

Black bean Burgers with Pineapple Salad

(adapted from Gourmet Magazine Feb 2009)
1 (14-ounce) cans black beans, rinsed and drained
1 (14-ounce) cans refried beans (I used the 365 brand)
3 tablespoons mayonnaise
1/3 cup panko flakes
2 teaspoons ground cumin
1 teaspoon dried oregano, crumbled
1/4 teaspoon cayenne
1/4 cup finely chopped cilantro
3 tablespoons vegetable oil
4 whole grain buns
1 (3-pound) pineapple, peeled and diced
1/2 pound jicama, peeled and cut into 1/4-inch pieces
1 (7-to 8-ounce) avocado, cut into cubes
1 small red onion, thinly sliced (1/2 cup)
2 tablespoons olive oil
1 tablespoon apple cider vinegar

Mix first 8 ingredients together. Form mixture into 4 patties. Heat oil in a 12-inch heavy skillet over medium-high heat until it shimmers. Cook burgers until outsides are crisp and lightly browned, turning once, about 5 minutes total. Serve on buns. (my hubby liked his with some melted cheddar and sour cream). For the salad toss together the last 6 ingredients with 3/4 teaspoon salt and 1/2 teaspoon pepper. If jicama isn’t easily found you could also use radishes.

~~~~~

Burger #2, Email from Rica:

Last night we [Rica & Don] decided to make burgers & fries for dinner.  I thought this would be just the usual burger…but it wasn’t…it was better than usual.  Now, this is either because of my extreme hunger or Don’s talent!  Here’s the recipe:

donsbigkahunaburger

Don’s Big Kahuna Burger

1 lb       97% lean ground beef
1/2       medium onion, grated
1/2 c    shredded colby jack cheese
1 tbsp   A1 steak sauce
1/4 tsp  fresh cracked pepper
1 tsp     kosher salt
1/8 tsp  crushed red pepper flakes
1 tsp     cajun seasoning
4          Of your favorite hamburger buns

Combine all of the ingredients, including the shredded cheese, in a bowl. Mix with hands until combined. Form 4 patties. Grill the burgers to desired doneness. Serve the burgers on toasted buns and top with your favorite burger toppings!

Enjoy!
 

Making Homemade Banana Bread March 1, 2009

Filed under: Recipes & How-Tos — queenbeeeatsforaday @ 9:18 pm
Tags:

banana-bread-2

Nothing is more rewarding or comforting than a thick slick of warm banana bread fresh from the oven.  It is the ideal breakfast slice or a relaxing afternoon snack with a cup of hot tea. For me, it reminds me of my mom’s kitchen as she made quite a few loaves of this when I was growing up.

While you may think that baking homemade banana bread is a difficult task, it is one of the easiest quick breads to make – probably because instead of yeast to leaven the dough, baking soda is used.  Because there is no yeast, there is no lengthy period waiting for it to ferment or the dough to rise.

All homemade banana bread takes is an appetite, a few overripe bananas, and a few minutes.

There really is nothing to this recipe and the longest part of it is the actual baking time (about an hour).  If you have a well-stocked cupboard then you probably already have all the required ingredients, as they are all staples.

I tend to make banana bread more often than any other type of baked good, simply because we usually don’t eat all of the bananas in the fruit bowl before they become too ripe.

I also usually leave out the nuts, as my sweetie just isn’t a fan of them in the loaf.

The Ingredients:

1 3/4 cups all-purpose flour
2/3 cup granulated sugar
2 teaspoons baking powder
1/2 teaspoon salt
1 cup mashed ripe banana (about 3 medium bananas)
1/3 cup butter or margarine, room temperature
2 tablespoons milk
2 eggs
1/4 cup chopped nuts (optional)

The Steps:

Preheat the oven to 350°.

Combine 1 cup of the flour (keep the rest for later), the sugar, the baking powder, and the salt in a large mixing bowl.  Add the mashed banana, butter, and milk and beat on low speed until everything is blended.  Then, mix for about 2 minutes on high speed.

Add the eggs and the remaining flour, beating until completely blended.  Stir in the nuts by hand.

Pour the batter into a greased loaf pan (about 8x4x2-inche pan) and bake for about 60 minutes.

Remove from the oven when a toothpick inserted near the center comes out clean and cool on a wire rack for about 10 minutes.  Remove from the pan and allow it to finish cooling.

The recipe yields one loaf, about 16 servings.

Cooling Banana Bread

Cooling Banana Bread

Tips and Tricks:

– Do not over mix the batter, as it can affect the moisture and density of the bread.
– If you don’t have any butter or margarine, or don’t have time to wait for it to become room temperature, you can use shortening.
– It is best to grease your loaf pan with butter or shortening.  Non-stick spray never works as well.
– The nuts are optional.  Try walnuts, pecans, or a combination of your favorites.
– Try sprinkling some sugar on the top of the batter right before baking.  This gives the top outer crust a little extra sweetness.
– Serve sliced banana bread with butter or cream cheese.


Valentine’s Day Sides – Braised Swiss Chard February 23, 2009

swiss-chard

This is one of the side dishes served up with our Valentine’s Day dinner.

It is my own version of a Dave Lieberman (of Good Deal fame on the Food Network) recipe in which he used a couple of different types of greens and ingredients.  Needless to say, this was the least popular part of the fabulous meal, but it definitely has potential and I will be playing around with it quite a bit.

If you’re feeling brave, give it a go and let us know how it turned out.

Braised Swiss Chard – The Recipe

What You’ll Need:

· 1 tbsp olive oil

· ¼ pound bacon slices, roughly chopped

· 2 garlic cloves, thinly sliced

· ½ cup chicken stock

· Just under 2 ounces cider vinegar

· 1 tsp sugar

· 1 bunch red Swiss chard, ribs removed

· Salt and freshly ground black pepper, to taste

What to Do:

Heat the bacon and oil in a large pot over high heat until the bacon is well browned. Stir in the garlic and cook for about 30 seconds. Deglaze the mixture with the chicken stock and vinegar.

Stir in the sugar and add the Swiss chard. Toss to coat the partially cover the pot. Reduce the heat to medium and cook for about 30 minutes. Season with salt and pepper.

Tips and Tricks

Do not burn the garlic otherwise you will need to start over. The garlic should become tender, not brown. (Singed garlic will ruin the flavor of the oil and bacon.)

When deglazing, be sure to use your wooden spoon to incorporate all the drippings stuck to the bottom of the pot.

Make sure the Swiss chard is dry before adding it to the pot. If it is wet, you may splatter oil and get burned.

You may want to roughly chop the Swiss chard before cooking though this is optional.

The Outcome

The final outcome of this dish was much different than what I had expected. My sweetie didn’t love this dish (though he doesn’t really love Swiss chard but eats it now that I have learned of its really healthful benefits) but I saw the potential in it. I will definitely have to play around with it again, as it was a variation of another recipe I had found (which included collard greens and mustard greens as well).

Also, you may want to use the ingredient measurements as suggestions rather than a strict guide, as the liquid is just to add a touch of flavor and to cook the greens down. You may like the overall dish less sweet (therefore use less cider vinegar and sugar) or just the way it is.

Good luck!


Valentine’s Day Sides – Parslied Potatoes February 21, 2009

Filed under: Cooking Adventures,Recipes & How-Tos — queenbeeeatsforaday @ 4:14 pm
Tags: ,
parsley-potatoes

Parslied Potatoes

When I was growing up, my mother would often make this dish.  I never really loved it until recently.  My sweetie really, really, REALLY loves mashed potatoes, but one can make mashed potatoes (any recipe) so many times.

These parslied, or parsley potatoes, are a nice alternative – simple, refreshing, and tasty.

The Recipe

(Courtesy of QB’s mom)

What You’ll Need:

  • 1 pound red potatoes, peeled and cut into bite-size pieces
  • 1 tablespoon salt
  • ½ stick butter
  • ½ cup fresh parsley, chopped
  • Salt and pepper to taste

What to Do:

Place the potatoes in a large sauce pan with enough cold water to cover them.  Add the salt and bring to a boil.  Boil the potatoes until they are just tender, about 15 minutes.  Drain.

Melt the butter in a separate pot.  Add parsley, salt and pepper (to taste), and bring to a boil.  Add the butter mixture to the potatoes and toss to coat.

Tips and Tricks

  • It’s a good idea to put the drained potatoes back into the hot pot so any extra moisture can be absorbed.
  • You can use a microwave to make the butter and parsley mixture if you are short on time.
  • If you don’t have fresh parsley, dried parsley is OK. Just use a little less. Remember, dried herbs are stronger than fresh.
  • Add garlic for an extra kick.

The Outcome

These potatoes were a great, simple accompaniment to the filet mignon with Roquefort sauce, braised Swiss chard, and sauteed snap peas.  I chose this recipe not only for its simplicity, but because my sweetie had also requested them.

XOXO
QB